So, in no special order:
Within a couple of days of getting it home I moved the table from its crazy storage postion above the cab, space we wanted for our bedding, to a more suitable place on the outer wall of the washroom, using some easily sourced fittings bought on the 'net.

This also meant that we had to make the shower curtain bigger, to cover the stored table. I sourced some identical curtain rail and added this. Chrissie made up a new, larger curtain from fabric similar to the original.
We don't use clothes which need hanging but did need space for our rucsacs. So, out came the wardrobe hanging rail and in went a shelf to allow storage for outdoor jackets, waterproof trousers and the like, leaving plenty of space below for 2 rucsacs.

After stripping down a spare luggage net I fitted a retaining net into the small cupboard by the sliding door, to allow better use of the storage there.

Here's the shelf I added to our crockery cupboard, having previously removed the dedicated storage for the supplied Auto-Sleepers porcelain crockery (nice thought but not very practical) allowing much more efficient use of space.

I've also done a similar job in two of our offside lockers. The front one, I added an upright to leave enough room to work on the aerial stuff when necessary. I also positioned the shelf to allow use of the smallest size of those cheapo baskets available everywhere.

The rear one's organised to take bits and pieces, leaving a full height section for books, maps and dvds.

You'll note that I've added a piece of timber to form a lip on all the shelves and all are lined with non-slip matting.
And a pic showing the clock I added soon after purchase and also the padding we fitted to stop banging our heads on the bottom of the overcab locker. Some vans have these; why not Auto-Sleepers? We made this from a length of pipe insulation, wrapped in fabric then held in place with strips of velcro.

I've recently improved the cushion. It was tending to get pulled off the velcro every time I pulled the duvets from the overcab space. So, after lots of planning, I stapled the fabric to a batten, screwed the batten to the panel over the cab, wrapped the fabric around pipe insulation then stapled it to the front edge of the panel. I then covered the staples with a timber molding, screwed in place.


It looks much more professional now, I think.
Next, the "Stopsy" I saw mentioned on motorhomefacts. Bought from Germany (I think) it's just a right angled bit of carefully cut stainless steel with a small, rectangular hole in it. The caster at the top the door will rest in this, holding the door in whatever position you choose. It's glued in place with some stuff supplied with it.

So the opened door now looks like this. Really useful if you're not quite level as it stops the door opening fully or closing. Really simple bit of kit. Wish I'd designed it!

Here's a pic of our Oregon Scientific weather station. We have one of these in our bedroom at home and we're addicted to it. It has a remote wireless sensor and the time is updated by radio signal. Best of all, if on mains, it projects a red image of the time and outside temperature onto the ceiling, so you can see it from your bed - we just love that. The clock itself is battery operated, only the projector is 230v.

The outdoor sensor is wrapped in two placcy bags and tie-wrapped to the "bike rack". It's not really a bike rack any more cos I removed the bike rails and filled the gap with some rubber to add extra support for the box. Update: April 2013; sick of the connection failing between the outddor sensor and indoor unit we've dispensed with this. Also, we're rarely on mains so the projector is fairly useless. Instead, I have an app on my phone which gives us an illuminated bedside digital clock. We have outside temp from our unit on the dashboard (see below).

It drove me potty not having an outside temp indicator on the dash, (why, oh why don't relatively upmarket converters use the highest spec van? These ARE available from Peugeot with extra trip computer facilities, fog lamps, temp sensors etc - rant over). Virtually every car has one nowadays. So I sourced this one for under a tenner. It's wired but the thin cable slipped under the door seal and the sensor's fitted under one arm of the door mirror by a supplied sticky pad. The unit's battery operated.


The addition of a couple of hooks on the outside wall of the washroom gives a handy place to hang damp, mucky dog towels. This uses an otherwise wasted bit of space behind the closed door. Incidentally, for ALL our towels, including dogs, we use various sizes of Lifeventure microfibre towels. They are just brilliant. We use bath sheet size for showering and they work really well and, importantly, dry quickly, especialy if hung in our onboard drying room (otherwise known as the washroom) which gets really warm when the heating's on. We use a hand sized one in the kitchen and have four mid sized ones for the dogs. They also take up much less space than cotton towelling.

This is the full width draught excluder Chrissie made for the rear doors. It's just held in place by the closed doors. The floor gets quite cold here and it's the dogs' bed at night. Some time this summer I hope to try to insulate inside these doors, as well as the cab doors. Update, May 2013: doors insulated and velcro added to this draught excluder to keep it in place (see later on this page and post, "Is it me or is it cold in 'ere?).

This blue stuff is the non-slip matting we use at the bottom of all our cupboards to stop thing moving about too much. It was bought as a roll from Dunelm Mills; must get some more for the new crockery cupboard shelf.

Here's The bumper guard I added to the front to give a little protection. Bought on a roll with eight end pieces I fitted on the most prominent bit of the lower front wings. Why do they paint these? The original black, textured plastic is far more practical (Auto-Sleepers please note).
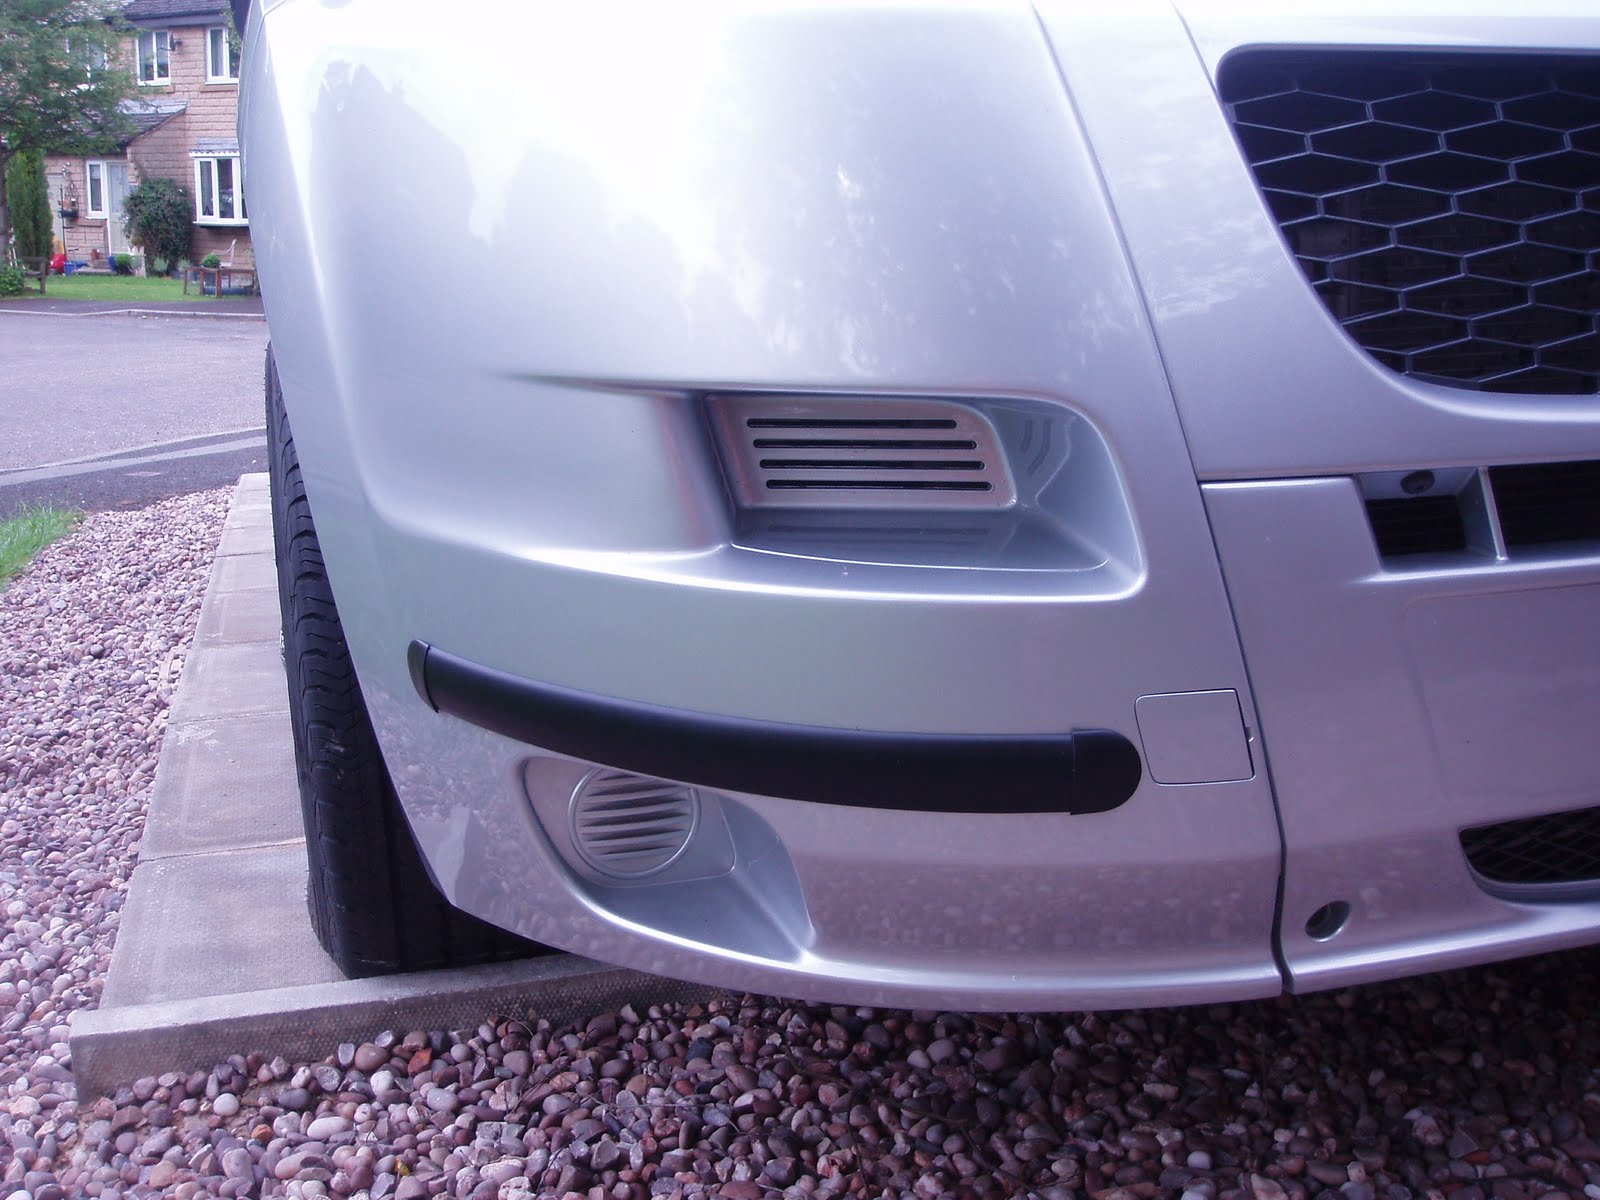
Also outside, a touch of bling in the form of three orange reflectors down each side. No real justification - I just think they look good.

Here's a simple hook stuck to the glass, directly above the water fiiler. A length of elastic cord holds my funnel in place so I can decant from the water carrier, single handed, as need dictates. Sounds faffy but it means we DON'T carry the, much recommended, watering can. Just where do people put one in a panel van? Instead, our collapsible water carrier and funnel take up much less space.

Inside our wardrobe door we have a laminated inventory of what's stored where in the van. We thought it might be useful in finding where we put that just-in-case emergency, spare whotsit.

And above the kitchen unit we have two laminated prompt cards. One for setting up on site and, more importantly, one for leaving a site. We ALWAYS check this before driving off.

Staying with the prompt card theme, these two live behind the driver's side visor. One each to remind us that the tank heater's on (leaving it, if not on mains, could easily flatten the leisure battery) and one to remind me to turn off the gas before boarding a ferry. We don't routinely turn off the gas at the lpg tank since doing so involves lying on the ground! I'd be interested to hear how others cope with this.

When in use, we place one or other of these behind that convenient little plastic clip on the windscrren pillar.

We also made this one to hang around the mirror arm so as not to forget that we've left washing in a site drying room.

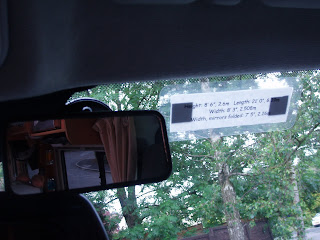
In this pic you can see our laminated card with the van's exterior dimensions on it alongside the kiddy mirror, sorry, doggy mirror, so, if I'm on my own I can see what the dogs are up to. The original mirror's covered by the clip on reversing camera monitor.
I added a liitle square of rubber to the window frame to stop the cooker lid rattling against the plastic whenever anyone stands on the doorstep and rocks the van. Who said I was compulsive obsessive?

You just can't have too many hooks. I'll not show you them all but here are three just under the crockery cupboard. One has the litter bin hanging from it and we use the others for the ignition key and any keys belonging to a campsite.

And now a couple of storage hints. We store our water fill up hoses in a large drawstring bag kept in the small space behind the driver's seat. It's easily accesible from outside and a hook up at the top of the front of the kitchen unit means we can slip the drawstring over it to stop the bag from rolling out in transit (actually ... it's a boxer).

We keep our mains lead, again in a drawstring bag, along with continental adapters, in the driver's door pocket. Also here, in the smaller blue bag, is an extension pipe to allow us to empty the waste water into a drain which we can't quite drive over; typically on some French sites.

In the left door pocket we have a folding plastic stool, which serves as a step stool for arranging stuff in the back box (it's not necessary unless your actually packing it from scratch), accessing the cubby holes at the side of the overcab storage and a coffee table for use with outdoor chairs. Also in there is our Lifeventure folding bucket, a litre of engine oil and a placcy bag containing three Co-op cotton shopping bags.

Here's the dogs' Road Refresher water bowl. It's never yet been knocked over or spilt. I seem to remember this design being a "failure" on Dragons' Den. Highly recommended - the dish that is, not flippin' Dragons' Den!


Now that warmer weather's arrived we find that, when touring, it's a faff to keep putting our folding chairs back under the nearside sofa and had started just leaving them on the floor. This solution looks a bit odd but in fact, they don't actually seem to get in the way. We tried it temporarily on the Pennine Way trip and after I got home I screwed some copper pipe clips to the panel below the seat, cut some luggage elastics to the right length and now it's the chairs permanent home when driving. Plus, it's released more space under that sofa.

Update April 2013; the fastenings are now upgraded to webbing with fastex buckles - much easier to use:

Another little mod following the P Way trip. We found that we needed easy access to the dogs' tethers especially if they were wet and muddy on returning to the van. We use stuff sacs a lot. Here, we've put the two tethers into a small stuff sac which easily fits between the passenger seat and door pillar and is secured by a small, self adhesive hook, out of sight in this pic, higher on the door pillar. Simples! By the way, the tethers are lengths of tape, bought from a climbing shop, which we "larks foot" around an alloy wheel spoke and they each have a carabiner on the end. We use carabiners cos we've got lots around from our mountain rescue days but a simple snap link would be cheaper.

The above really does work better that it sounds, or looks. Yet another example of utilising a bit of unused space with a little lateral thinking.
We noticed that if we made up the double bed and pulled the centre of the bed base we could easily pull the beech slats out of their plastic fixings, so I put a screw in each end of a central slat to give more rigidity. Dome headed screws mean no damage to the upholstery.


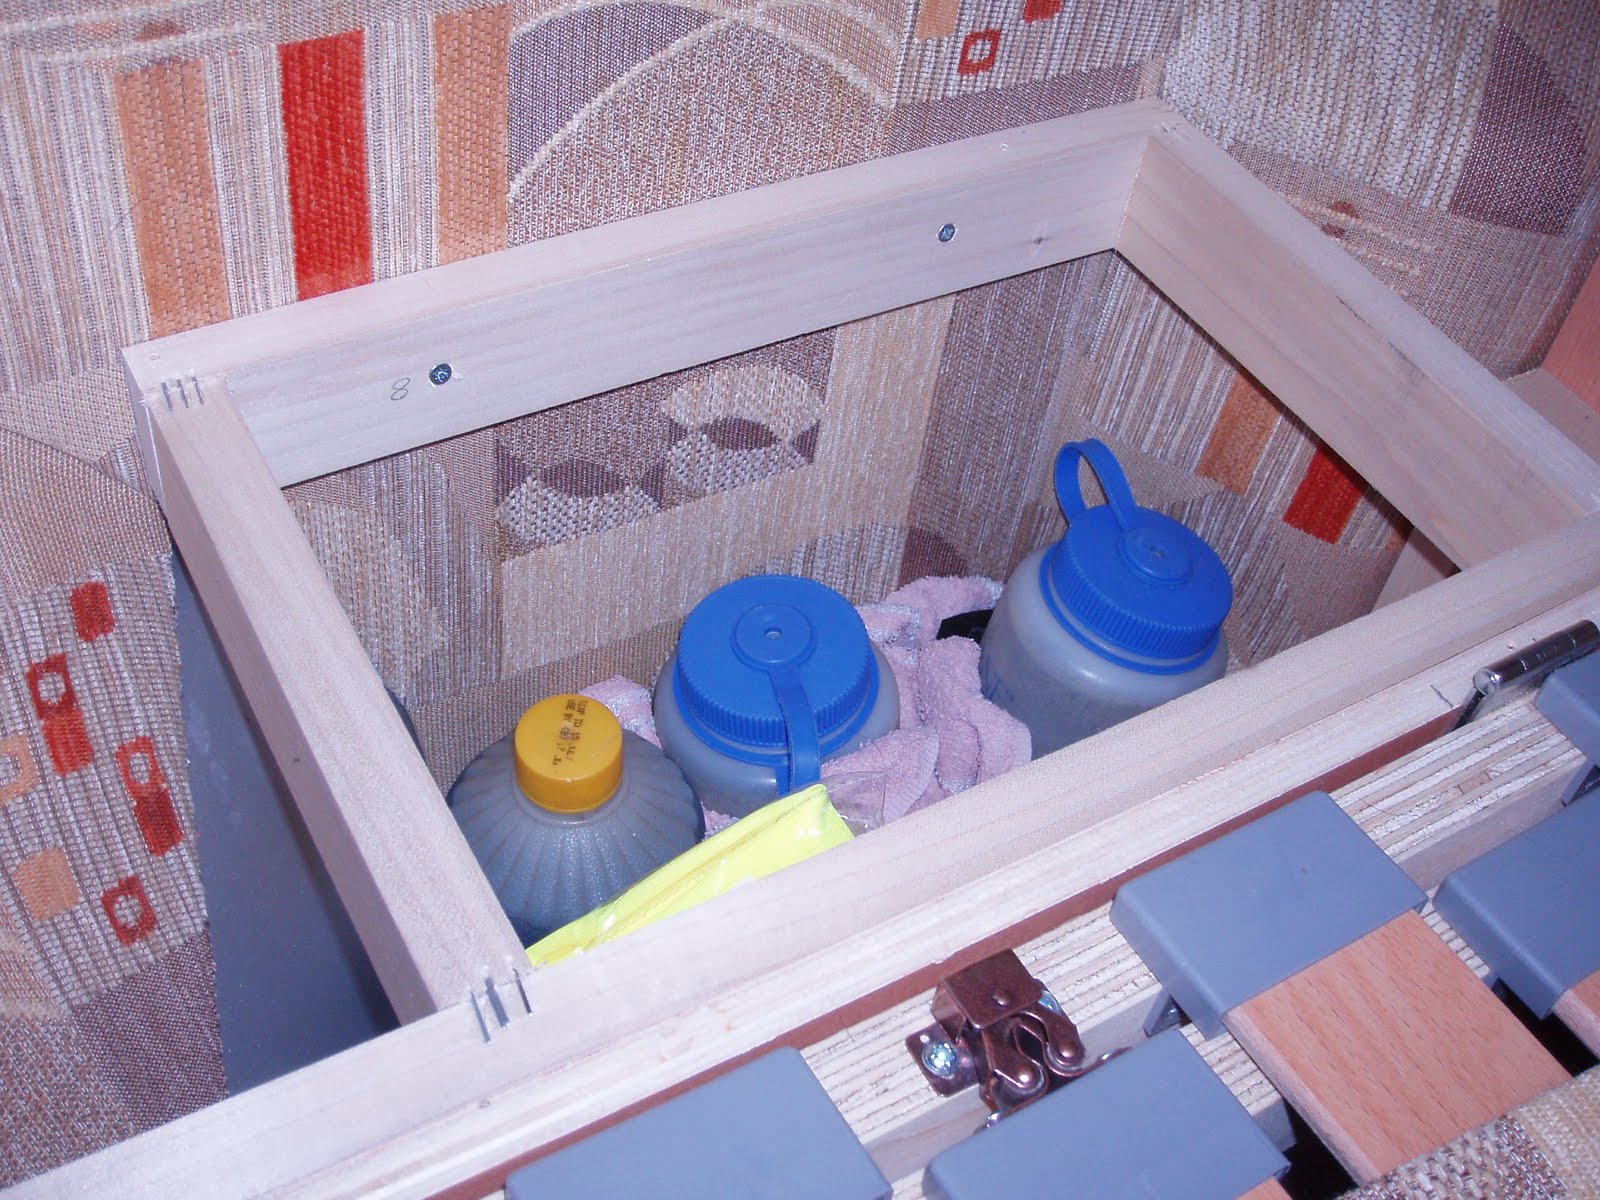
Now this is an idea copied from Roly on motorhomefacts (thanks Roly). Under the offside sofa, if you remove the screws in the upholstered panel around the wheelarch it reveals a "secret", trimmed comparment. So I've left out the screws and find the panel stays in place, no problem (Roly fitted his with velcro pads) and we use this, not so easily accessible space, for "emergency items". In there we have; 2 litres of water, a litre of windscreen wash (undiluted) and our hi vis vests.

Here's my mod to Auto Sleepers's coffee table. We didn't like having to lift the sofa base to use it or store it. So I added a couple of hooks and some shock cord to hold it place while driving and a simple shock cord restraint to hold it up against the curtain when we want it out of the way to use the double bed or the large table.


The original upholstery is a pattern of pale brown and beiges; not exactly dog friendly, so the front seats were covered with grey nylon waterproof covers which we already had.

And Chrissie fabricated some slip on covers for the sofas from fleece bed throws bought from Dunelm Mills.

After this photo she also made covers for those bolster ends and we sourced some washable cushion covers too.
I fitted self adhesive hooks all over the place and resited the fire extingusher to up above the worktop. Its original location fouled the swivelling driver's seat. Above that is a small, hanging waste bin from Lakeland. Not ideal but we've lived with it now for over 6 months and it's the best solution we've found so far.

Next came two Fiamma soap dispensers; one for hand wash and one for washing up liquid. Both these have proved fine held in place with the supplied self adhesive pads. They're both fitted above the kitchen unit and mean you don't have to have bottles of these things cluttering up the precious workspace.

The washroom already had a soap dispenser fitted; we use that for shower wash/hand wash. I added another Fiamma one for that clever anti-bacterial hand cleaner that needs no water (as in hospitals). It's readily available and helps conserve water when wild camping.


Above the kitchen I fitted a simple kitchen roll holder and a clockwork kitchen timer.

We found that every time one of the hounds touched the bottom of the oven, the push-push catch on the storage opened. I added some hidden hooks and a length of shock cord. You can still open the door by pulling the cord up.

This super little pin board in the shape of a mountain horizon with fir tree pins, came from Abi, who was in New Zealand at the time, as a birthday pressie for Chrissie. It could have been purpose made to go on this locker window.

The position of the loo roll holder meant it was always getting wet from the sink so I initially moved it to on the door; much easier to reach when you are "in action" as it were. Then we found we kept knocking the roll off the holder so, on close examination, I found I could turn the arm through 180 degrees, so I did. I also removed the folding shelf on the door, designed to hold a hair dryer (Chrissie's not really a hair dryer girl). It was unused and annoyed me as it knocked every time I opened the washroom door.

Here's a simple and obvious one. Our spirit level is fixed to the worktop, in the back corner behind the oven. I can easily turn my head from the driver's seat to see this. I have to add that we're very easy going about levelling and it makes us smile when we see vans, clearly off-level while sitting on misused ramps, or ramps used to lift the van an inch or so. We find that on level ground our van is high at the back, it's just the way the suspension sits. But that gives us a slighty head up sleeping position which is fine. For us to get exactly level we'd have to have a slightly sloping pitch ... or use ramps. Really, life's too short. If it feels ok, then it probably is.

The Peugeot cab only has one drink holder. I bought this one for a couple of quid from my local car accessory shop. It was hook shaped to go into the door window slot. I chopped off the hook bit and, using a lighter, heated the plastic then bent it through 90 degrees to leave it looking like in the pic. Then I used sticky pads to fix it to the armrest ... and it works! Update April 2013; no it doesn't Geoff; it keeps falling off - hardly used it anyway so it's gone in the bin!

I like a bit of subtle van bling. I just felt that the name "Warwick" said nothing about the van, or us. I was probably influenced by our car; a Subaru Forester, which a nice outdoorsy ring to it, and my motorbike; a BMW R1200GS Adventure, a real overland traveller's machine, which has so far been as far as the Sahara desert, including off-road. So I bought a bagful of chrome letters off the 'net and here's the result.
One on each front door.

And one on the back.

So our van's now renamed as an Auto Sleeper Warwick ADVENTURE, which we feel reflects our use of it. Update April 2013: these started to corrode after 2 years so they've been replaced with some black, reflective stickers, meant for a BMW R1200GS "Adventure" motorbike (like MBM). I got 'em from Humvee Graphics (Google it). Here's one on a door:


Note that Auto Sleepers have carefully placed the "Warwick" badge on the back door so it's completely obscured when you fit the Fiamma bike rack ... which THEY recommend. Oh well.
Since we were planning to use the van in all conditions we bought some Spike Spider snow chains. These are extremely easy to fit due to the clever adapter plates which stay on the front wheels throughout the winter. The chains then take only about 2 minutes to fit and less to remove. They really are superb products and have been used once, to get us out of a tricky predicament, but more of that later. They were expensive (about £300) but we think the ease of use justifies the cost.
Since we were planning to use the van in all conditions we bought some Spike Spider snow chains. These are extremely easy to fit due to the clever adapter plates which stay on the front wheels throughout the winter. The chains then take only about 2 minutes to fit and less to remove. They really are superb products and have been used once, to get us out of a tricky predicament, but more of that later. They were expensive (about £300) but we think the ease of use justifies the cost.
I thought I should share this. We could only buy the van because of cash raised by selling Chrissie's Mum's house. Chrissie lost both her parents relatively closely in time; both from brain tumours, and for that to happen twice in a family is pretty much unheard of, according to a GP friend. She went through a very sad time. So we have this in our van.

I wonder if we'll ever get to the point of not making any more modifications? Any questions or comments, use the link to my guestbook.
Update April 2013.
Whilst updating the blog today I looked round the van to see what else I'd altered or added. Some are inserted above next to the original mod. The rest are here:
I don't normally like mudflaps; they can catch and hold muck causing corrosion, but I didn't like the way the front wheels threw muck up onto the retractable doorstep. So I sourced these for front and rear wheels. They're the new version of the factory mudflaps, were easy to fit and look ok.


I love these. They are LED daytime running lights and for about £65 inc postage, came from LEDCOM with all the necessary wiring. They fit in the spaces intended for fog lamps, come on with the engine and dim when you turn on the headlamps. I always drove with lights on so these are saving life on a lot of bulbs (headlamps, parking lamps, no. plate lamps and tail lamps) but still make us more visible on the road. Easy to fit, look good, job done!

You can just see 'em in the shot below:

We found this simple waste bin in a dealers in Denmark during a big Scandinavian trip in 2012. It does what it says on the tin and just fits behind the passenger seat.

I added a couple of vertical dividers in the big space under our nearside sofa. It helps keep things more organised and leaves a space for our vacuum cleaner, making it easy to get in and out.

We sourced a double USB socket to plug into the, almost useless, 12v socket in the kitchen. We mostly use this to give our phones an overnight charge.

I fitted a 300W inverter behind the drtiver's seat. It's wired directly to the leisure battery and the size was chosen cos it's sufficient to run our little Dust Devil, mains vacuum cleaner. NB These low wattage vacs are not available anymore so we'll have to take care of it. The inverter comes in handy for charging stuff like camera battery chargers or my notebook computer whilst on the move ie when the battery is constantly being charged by the alternator.

Following a couple of messy accidents with spilled food, not to mention mucky dogs, we've found our optimum floor option to be; carpet in the loung for a cosy feel but no carpet (ie vinyl) in the kitchen/entrance. Aided by a microfibre bath mat in the entrance (microfibe = easy to wash and dry - remember?) this combination has worked well for us for almost a year now.

A recent addition, this little battery, LED light covers the lack of lighting in our study (front of van) at night and is powerful enough to read by. Excellent cheap mod.


Similar to ones on MBM's panniers, these refective black chevrons show up in the dark, to vehicles approaching on narrow roads but are virtually invisible in daylight (they are reflecting flash in this photo). They're from Humvee Graphics, like our "Adventure" stickers. You have to buy a set of pannier stickers:

Out of concern for our doggies, and their need for shade in hot weather I fitted a Fiamma, wind out canopy. Silver ones had just become available so it looks good on the van:

The winding handle is stored on the outside of the washroom - easily accessible:

We now have a Fiamma flyscreen fitted over the door. It's intended for coachbuilt vans but with a bit of ingenuity I made it fit. It rolls up neatly when not in use, above the door:

This is how it looks "in action":

To keep it in place on the left side I added a couple of press studs which mate with the night time curtain retain studs already there:


This collapsible silicone bucket has replaced the folding Lifeventure one we had. That one insisted on falling over when left unattended. Damned inconsiderate of the blighter! This 'uns much better. Halfway stood up (centre pic) it should serve as our water catcher in freezing conditions when we leave the waste tank tap open:


Following a failure of the heating sensor, on advice from the technician who replaced it, I moved it to lower down in the van, so it takes longer for it to register, and thus turn the heating off. Hot air rises - initially it was right up near the ceiling (see my Somme poppy which covers the hole). So as soon as the top of the van got warm it switched off heat. Now, we don't sit on the ceiling! Now it's at shoulder height. It takes longer for heat to build up (or down) to this level. That sounds about as clear as mud Geoff! It's the black round thingy diagonally below the light switch in the pic:

Not really a mod but I'm proud of all these stickers; momentoes of our travels so far. I'm a sucker for a sticker - If you don't like 'em ... tough. We do ... an' it's our van. We love our van! And we love wot it allows us to do ... have fun. Smile x.

Pointless bling perhaps, but I've fitted proper Peugeot headlamp protectors, which are marked out for where to stick your continental adapters (that sounds a bit rude Geoff). Easy to fit ; an idiot (me) could do it ... and did. Here's the proof:

That's all for now folks. Where will it all end?
Never, is probably the answer to that Geoff.
Here's a couple of photos of the lovely draught excluder we made for the gap twixt the rear doors (for more details see post, "Is it me or is it cold in 'ere"). Added to the floor draught excluder we already had, and the fact that the doors are crammed full of loft insulation, the back of the van should transmit much less cold into our lovely living space.


'Makes me feel all warm just looking at it.
In May 2013 I fitted these delicious Remis cab blinds, thereby doing away with the front curtains.


They are just gorgeous motorhome bling and I make no apologies for 'em.
Today (12.5.13) I fitted this, widely available, magazine rack thingy. Don't know why I haven't done this before. The only place we have for mags is the centre storage below the dash but it's getting rather full with notebook computer, Haynes motorhome manual & wotnot. So this, fitted on the outside of the wardrobe door, will serve as easy storage for a couple of mags. If you do this, beware, the door's hollow so I drilled tiny holes and used carefully chosen self tapping screws. If you use a magnifying glass you might see there's a piece I wrote on the young James Cook mentioned on the cover of this issue of MMM.


Above it, I recently put up a small montage of pics of recent travels, mostly from Harris & Lewis this Easter and one from Norway last summer.

It's now October 2013 and our lovely van is three years old. In the last couple of weeks, by way of celebration, we've fitted a satellite TV system along with an upgraded TV;

... and a towbar, along with a towbar mounted cycle carrier;

Our lovely van now has a shiny new MOT certificate and is ready and waiting for more fun and travels.
Update: In July 2016 we traded our Warwick Duo in for a shiny new Bailey Approach Autograph 745. For details see separate page on here.